WordPress Blog Migration with Python

Part 1
In part one we will explore the different ways we can get blog content from a website when we have no access to the back-end. Starting with if the old website is WordPress and has the REST API enabled. In part 2 we’ll go over if there is no REST or not in WordPress. Wrapping up part 3 with importing all the content in a new website.
The need
The task is to move all blog content and images, retaining post date and category into a new WordPress build. The issue is we don’t have access to the old websites’ back-end. Okay, maybe we can just copy and paste for most of it? Nope. There are over 600 posts! It would take ages to do this by hand. Luckily we’re developers and can script this.
Scope out the target
For demo purposes, we’ll be using our blog. We have nowhere near 600 posts (yet), but at least we can see what’s going on better. We’ll also assume we have no knowledge of how/what the website is developed with.
The first thing we check is what it’s built with.
We knew it was WP, but it’s always a great idea to check out what, if any, frameworks are used. Whether it’s WP or not, it’s always good to check if it has a REST API.
We know WP has a built-in REST API, so before we write any code, we can use something like Postman to poke around and get some more info of what we’ll be dealing with. We’ll add a limit to how many to return so we can also demo pagination. WP doesn’t always have the API enabled though, so it is always a good idea to check.
https://www.greatbigdigitalagency.com/wp-json/wp/v2/posts?per_page=20
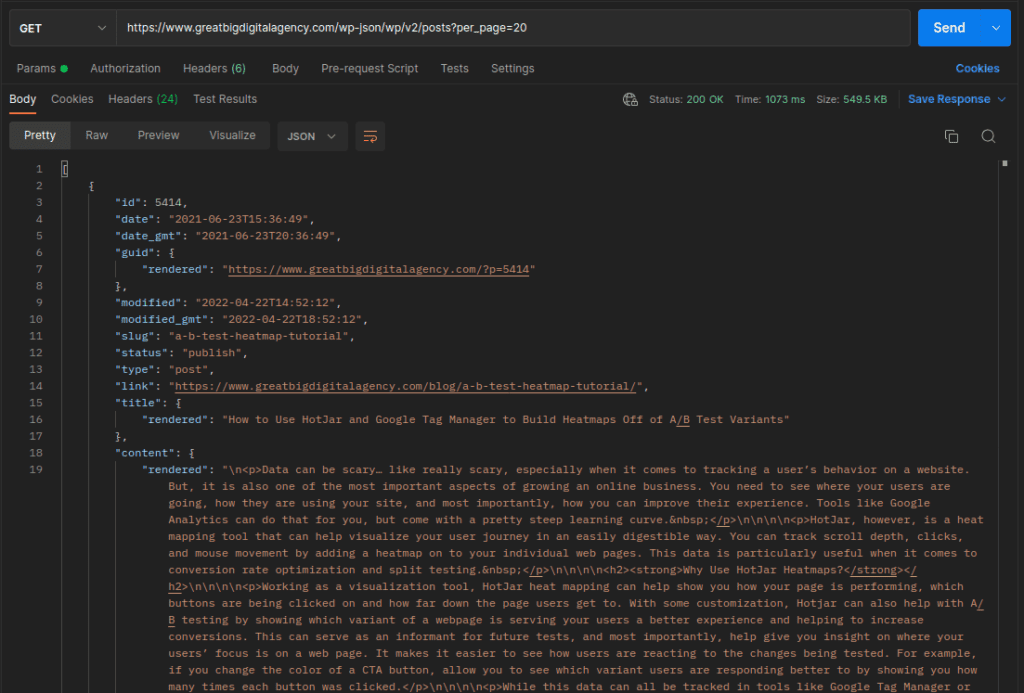
Awesome! We are getting post data, so we know the REST api is working at least. Next let’s take a look at the headers and see how many pages of data we’ll be getting at a time. This is important for later when we get to writing code, but for now just take a note of this number.

Looks like X-WP-TotalPages is 5. Also note the X-WP-Total which is how many posts there are in total, is 86 and can be something we check our scraped data against.
Last thing before we get to writing any code will be checking the data and making sure it’s giving us everything we need. The list of things we need is as follows:
- Title
- Slug/Permalink
- Post Date
- Featured Image
- Content and Inner Images
- Category
Inspecting the data returned in Postman, most of what we need is there. Minus a couple things. Important things. Featured Image isn’t there which is probably the biggest we need. Also the category is just a number and doesn’t mean anything to us. So we’ll add another parameter to the api to give us more info.
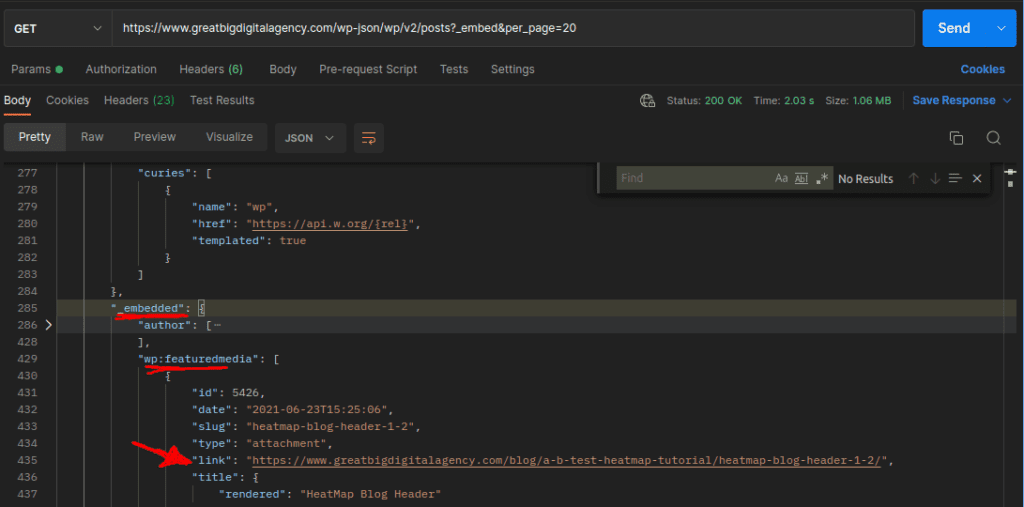
The new parameter we add is _embed , giving us the featured image and the category as a string.
https://www.greatbigdigitalagency.com/wp-json/wp/v2/posts?_embed&per_page=20

Now that we have identified the data and where it is in the JSON response, we can start coding this out.
Environment Setup
My work laptop is running Ubuntu Linux. Even if on Windows, development should happen inside WSL2, so the commands and anything OS specific should all be Linux from here on out.
It’s 2022, use a virtual environment for your Python project. I repeat, use a virtual environment for your Python projects. I don’t care if it’s pipenv or venv, but it needs to be done for anything using third party libs.
We will be using venv for this project. To create a new venv use the following command in the directory your project is:
$ python -m venv venv
This should have created a new directory called venv. Now we need to activate it in our shell:
$ source ./venv/bin/activate

Notice that my terminal now has a (venv) prefix to the path. Your terminal might not do this, but that’s okay. We can check with another command as well, note the capital V:
$ pip -V

We can see it is showing pip’s path being in the directory we’re working in, awesome! If you see something else pointing to an internal system folder like /usr/lib then you know you’re not in a venv.
Libs
We need only two third party libraries. It would be a good idea to dig into their docs a bit, these two libs are used VERY HEAVILY with web related things and Python. Specifically crawling/scraping.
- Requests:
- Used for getting the data from the api endpoint and downloading images.
- (venv)$ pip install requests
- BeautifulSoup:
- Used for getting images from inner content.
- (venv)$ pip install bs4
The Code
Finally the good stuff and what most people are here for! First lets create a new python file and pull in the third-party and built-in libs we’ll be needing.
(venv)$ touch yoink.py
(venv)$ code .
The new yoink.py file:
import requests
from bs4 import BeautifulSoup

from os import path, makedirs
from shutil import copyfileobj
from json import dumps
from time import sleep
I decided to call this script yoink.py and then we pull in the libs. We use from instead of just importing the whole thing. It’s good practice to pull in only the things you need.
Next up is some general config we’ll be using throughout the script and a sanity check.
# where we want to scrape
# the trailing / is needed
domain_name = "https://www.greatbigdigitalagency.com/"
domain_root = "greatbigdigitalagency.com/"


# found in the header of the response, I got it from postman
total_pages = 5


# attempt to add the trailing / if not found
if domain_name[-1] != '/':
   domain_name = domain_name+'/'
domain_name is used for the base for most of the code while domain_root is for a search-replace that we’ll go over in a bit. We’ve seen total_pages before and is the number you noted down when exploring in Postman. The last lines are to check and make sure the domain_name has a trailing slash, else we’ll run into errors when fetching things.
With that out of the way, we’re onto the entry-point of the script. We’re going to follow good design patterns and use a main function with a __name__ check.
def main():
   base_endpoint = domain_name+"wp-json/wp/v2/posts/"
   # set per_page for demoing pagination
   start_url = base_endpoint+"?per_page=20&_embed&page="
   current_page = 1
   current_url = start_url+str(current_page)
   all_posts = []
   for p in range(total_pages):
       current_page = p+1
       current_url = start_url+str(current_page)
       print('-'*42)
       print(current_url)
       print('-'*42)

       headers = {"User-Agent":"Mozilla/5.0 (Macintosh; Intel Mac OS X 10_15_4) AppleWebKit/537.36 (KHTML, like Gecko) Chrome/83.0.4103.97 Safari/537.36"}
       resp = get(current_url, headers=headers)
       data = resp.json()

       posts_from_api_page = get_posts(domain_name, data)
       all_posts.extend(posts_from_api_page)

       # comment this out to go faster
       sleep(.5)

   with open('out.json', 'w') as outf:
       outf.write(dumps(all_posts))


if __name__=="__main__":
   main()
First we set the base endpoint variable, this is the structure that the WP REST api uses. Then we add the parameter _embed so we can get the featured images and category names. page= is explicitly at the end so we can use it dynamically for the pagination. all_posts will be the list that holds, well, all the posts.
Then we’re ready to hop in a loop to hit the pages one by one. We set the current page and print out the page we’re on for when we run this. The next part is important, headers might not be required but most decent hosts will block these kinds of bots, so we set a User-Agent to fake being a browser.
Now we use requests and it’s get method sending along our headers. Save the JSON response to the data variable, then off to a custom function, that we’ll get to in a bit, to get each post data from the paged response.
We pause for half a second, not needed, but I don’t like to hit the servers too hard.
Lastly we write out all the post data in our own custom JSON file that we use to import. In the last part of the tutorial series, we’ll get into how we use this custom JSON file to import using python or php.
Now, about that get_posts() function….
# grab post data returned by the ?page=X endpoint
# domain is the root domain used in search-replace
# will be ran for each page
def get_posts(domain, data):
   rtn = []
   for d in data:
       # dirty check if it has a featured image
       try:
           featured_img_url = d['_embedded']['wp:featuredmedia'][0]['source_url']
       except:
           featured_img_url = None

       # dirty check if it has a category
       try:
           category = d['_embedded']['wp:term'][0][0]['name']
       except:
           category = None

       # download featured image and keep path structure
       featured_local_path = None
       if featured_img_url:
           # remove domain and wp path to images
           # used as local path to keep file/folder structure
           featured_local_path = featured_img_url.replace(domain+'wp-content/', '')
           print('Downloading: ', featured_img_url)
           downlaod_image(featured_img_url, featured_local_path)

       # split out to vars for clarity
       slug = d['slug']
       post_date = d['date']
       title = d['title']['rendered']
       post_content = d['content']['rendered']

       # grab any images inside the content itself
       soup = BeautifulSoup(post_content, "html.parser")
       post_images = soup.findAll('img')
       for img in post_images:
           img_url = img['src']

           # don't care about images linked from other domains
           if 'wp-content/uploads' not in img_url:
               continue

           # run some search-replace on the urls
           # do this in stages since some urls might not have www
           img_local_path = img_url.replace('https://', '')
           img_local_path = img_local_path.replace('www.', '')
           img_local_path = img_local_path.replace(domain_root+'wp-content/', '')

           print('Downloading: ', img_url)
           downlaod_image(img_url, img_local_path)

       # return a json obj
       rtn.append({
           "title": title,
           "slug": slug,
           "category": category,
           "post_date": post_date,
           "featured_image": featured_local_path,
           "post_content": post_content,
       })

   return rtn
Bit of a doozy eh? Don’t worry, we’ll break it down.
First up is kind of a habit of mine and setting a return variable at the top. This will hold the custom JSON data we get and pack. Now we loop through all the posts that we got from main(), running a dirty check to see if the post has a featured image or category.
Which brings us to if there is a featured image, we’ll need to download it. The first thing we do is keep the image path, but remove the first bit, so it’s only the image path starting from the uploads/ folder. Then pass it along to another custom function called download_image(), we’ll get to that one next, but let’s continue with the rest of this get_posts() function for now.
After getting the featured image, we get the rest of the information like the slug, title, and content. Now ready to check the inner content for images. We’re using BeautifulSoup to parse the html. I guess you could use RegEx, but for your own sanity, use a parser.
So we have a new bs4 object with the html of only the post_content, from here we get all img tags to loop over, if the img is in the wp-content folder proceed, else if the img has a src of some other site, we don’t care. We just want the images that have been uploaded to wp.
We need to do a search-replace on the path of the images though. We do this to remove the web portion of the path because we want to download these images starting from the /uploads/ folder to retain, locally, so we can just upload the folder via sftp and not worry about broken images.
After the inner images are taken care of, we add the post’s JSON to our return variable. That pretty much sums up the export process. What is returned from this function is written out to the JSON file.
Let’s now take a look at the function that downloads the images.
# https://stackoverflow.com/questions/273192/how-can-i-safely-create-a-nested-directory
# if file or path does not exist, create it
def ensure_dir(file_path):
   directory = path.dirname(file_path)
   if not path.exists(directory):
       makedirs(directory)


# download single image from server to local preserving paths
def downlaod_image(url, local_path):
   # timeout hard-coded for 5 seconds
   # https://miro.medium.com/max/1318/1*8xraf6eyaXh-myNXOXkqLA.jpeg
   headers = {"User-Agent":"Mozilla/5.0 (Macintosh; Intel Mac OS X 10_15_4) AppleWebKit/537.36 (KHTML, like Gecko) Chrome/83.0.4103.97 Safari/537.36"}
   r = get(url, headers=headers, stream=True, timeout=5)

   ensure_dir(local_path)
   with open(local_path, "wb") as f:
       copyfileobj(r.raw, f)
First up we have yet another custom function to make sure there is a directory to download to. If one isn’t found, create it.
The download_image() function is fairly simple, we set the headers to fake being a browser, get the image as a requests object, make sure we have a place to save it to, then save the raw data to a new local image. The local_path is what we created in the get_posts() function, featured_local_path and img_local_path respectively.
Run It
Now that we have gone over the code, updated the domain and other settings, we can run it and let it do it’s thing.

Awesome, just wait a bit and when you get your terminal back we’re all set!.
Let’s take a gander at the created JSON file.
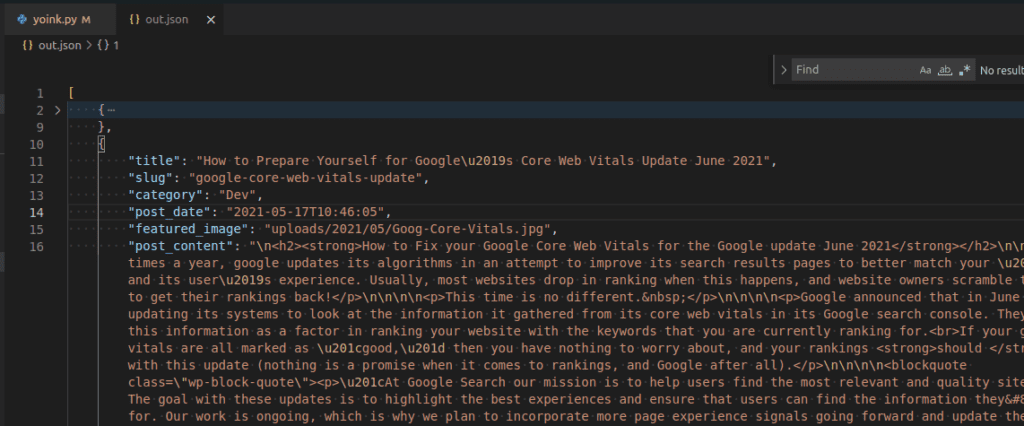
Yup, all there. Pro-tip, in VSCode right click the opened JSON file and select Format Document or the shortcut ctrl+shift+i will also work and make it easier to separate all the data in a prettier format.
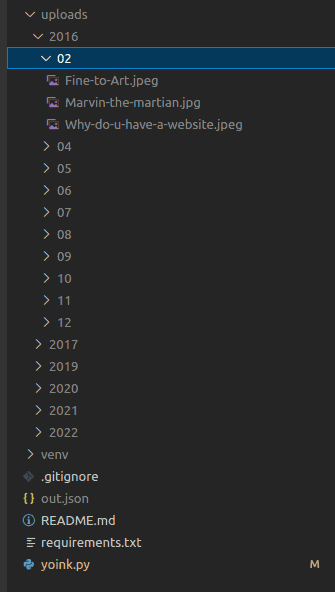
We can see the /uploads/ folder is also full of images! Notice it looks just like WordPress’s folder structure for uploads, this makes migrating images as simple as dropping this via sftp into the target folder.
Conclusion
Well that wasn’t so bad! Might have seemed like a lot, but when we break it down, it’s kinda simple. Get each page of post data from the API, search the content for images and download them, then pack it all into a custom JSON file we can use to import wherever we want!
Stay tuned, this is only Part 1. Next up we’ll expand on what we’ve done here and scrape blog posts when we don’t have access to a REST API. It could work for websites not in WP too. We also lean a LOT more on BeautifulSoup in the next part.

About Great Big Digital
Achieve your website goals with customized data, intuitive UX, and intentional design.