Setting Up Click Tracking in Google Tag Manager and Using it as a Goal in Google Analytics

Ever wonder how to track a click as a goal in Google Analytics? For instance, what if you want to track when someone clicked your phone number on a Landing Page as a goal in GA? Today we will be going over how to set up click tracking in Google Tag Manager and use that click as a goal in Google Analytics.
Set up click tracking in Google Tag Manager.
This tutorial assumes that you’ve already set up Google Analytics through Google Tag Manager. If you have not implemented GA through GTM yet, head on over to this introductory blog:
How to setup Google Analytics in Google Tag Manager
Once you’ve set up Google Analytics the first step is to determine what you want to track. For the purpose of this tutorial, we will be concentrating on tracking a click on a telephone link on our great big digital agency website.
(More of a video person? check out this video walkthrough.)
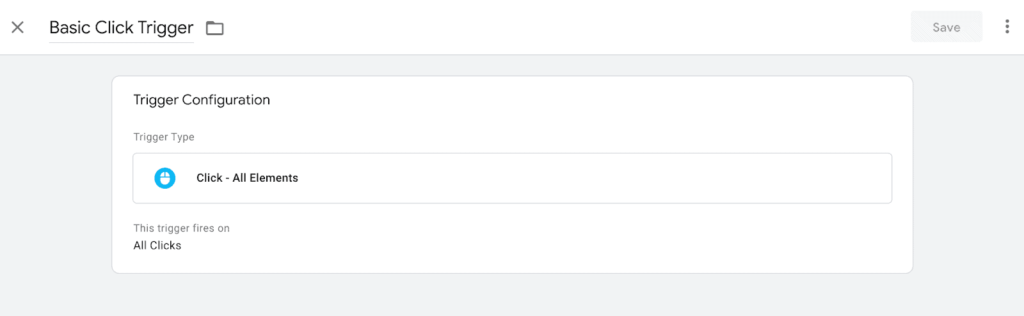
Create a Basic Click Trigger
The first step I like to do is set up a basic click trigger. Navigate to triggers in Google Tag Manager and create a basic All Clicks trigger.
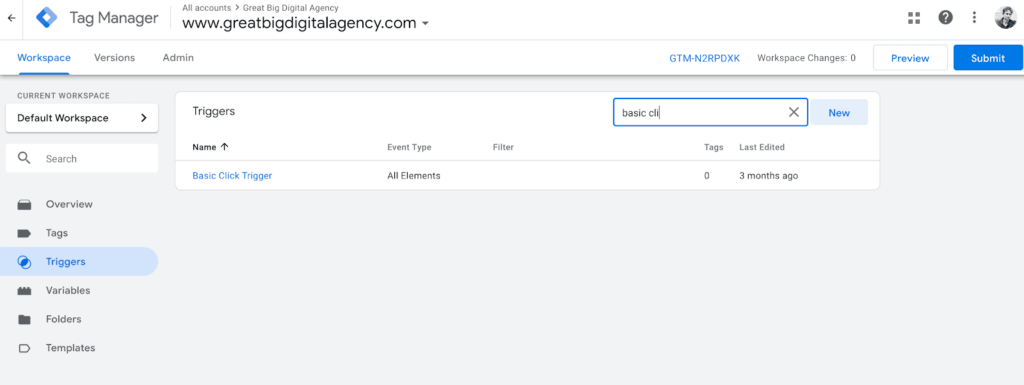
This will allow you to see clicks in the Google tag manager interface which will help you create the more defined click trigger.
Enable Click Variables.
Next, go to your variable section and click configure within the Built-In variables section.
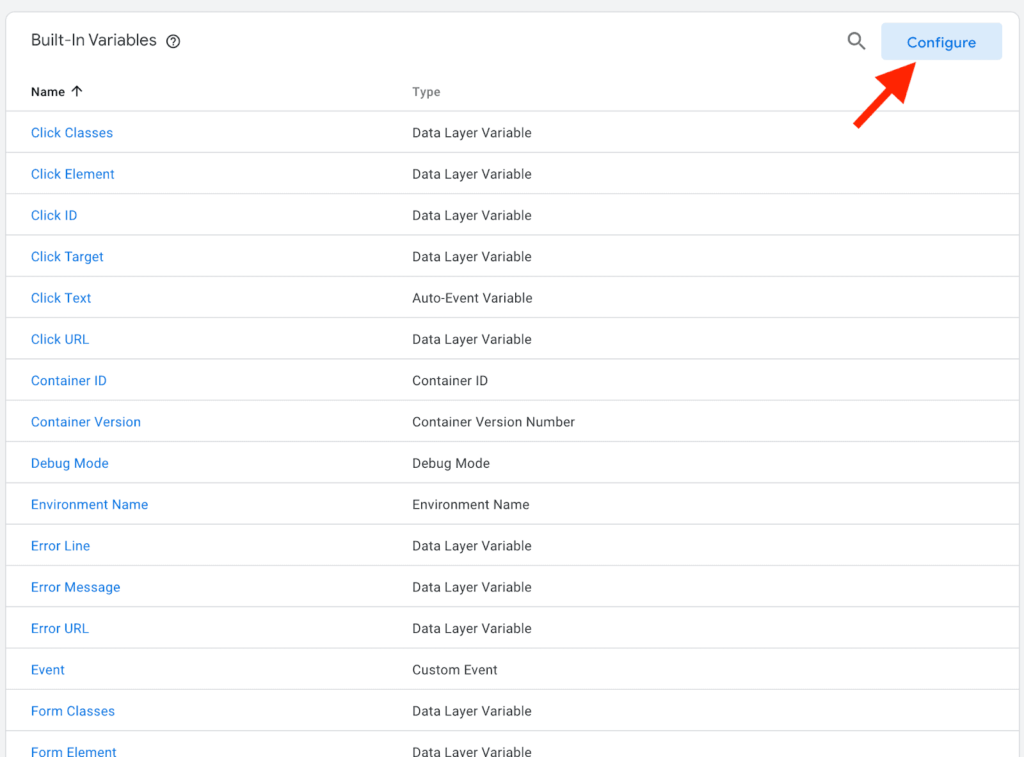
Next, enable all click variables. We can now use preview mode to get the variable data we need to build our trigger.
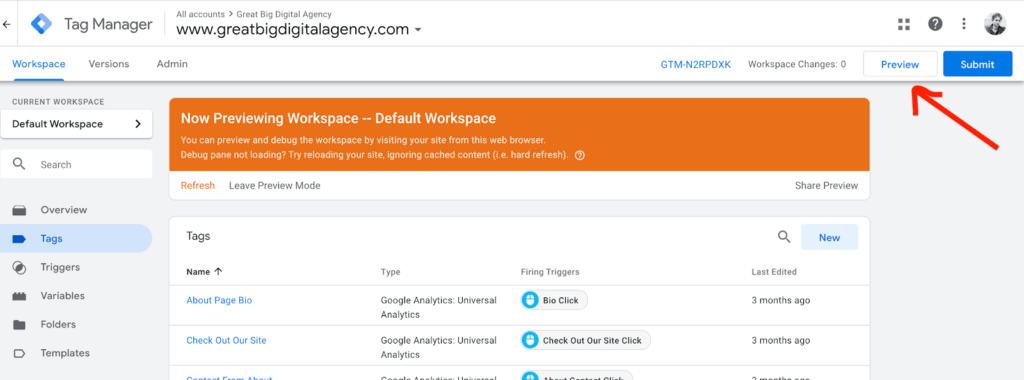
Navigate into preview mode and go to your website.

Once you’re on your website will see a new interface which is GTM preview mode. Click around a few times to make sure GTM is registering clicks on your website.
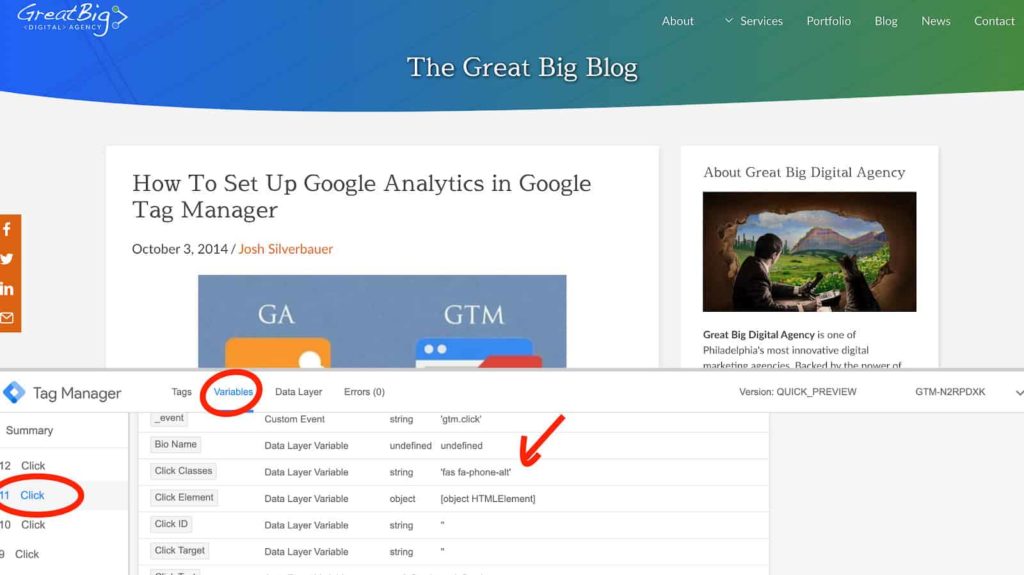
Once you see clicks registering, click on the item that you want to track. For this tutorial, we will use the call button on mobile.

Once, you click on the object you are trying to track. Go into your variables section in the GTM preview interface. Find the click event that matches the click that you want to track (you can do this by looking at the variables and finding one that seems to match your click). In the example below, I see fas-fa-phone-alt which is the icon click class. This is what we can use as the trigger specifications as it is unique enough that it likely won’t show up on any other click on my website.
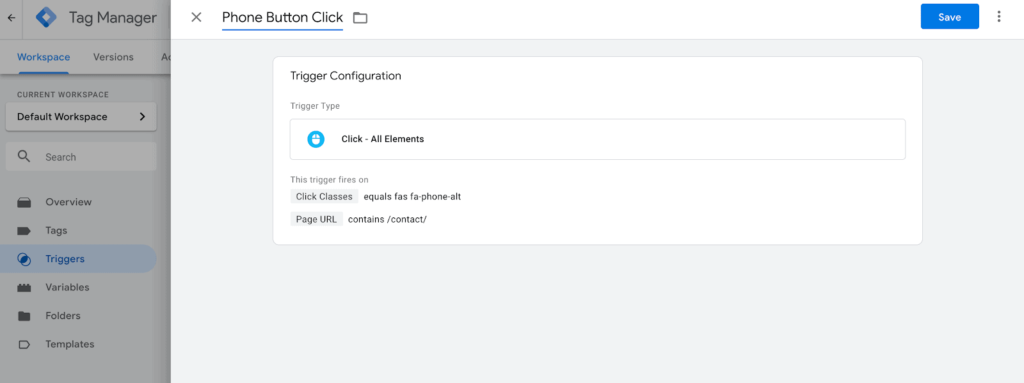
Build Your Specific Click Trigger
Navigate back to your Google Tag Manager and go to the triggers section. Build a trigger using the unique variable(s) that you determined in the step before. If the click occurs on every page just use click variables. If it only occurs on a certain page (such as the contact page) I would use a secondary trigger that defines it further. You want to avoid making triggers too open-ended or it could pull in data you don’t expect.
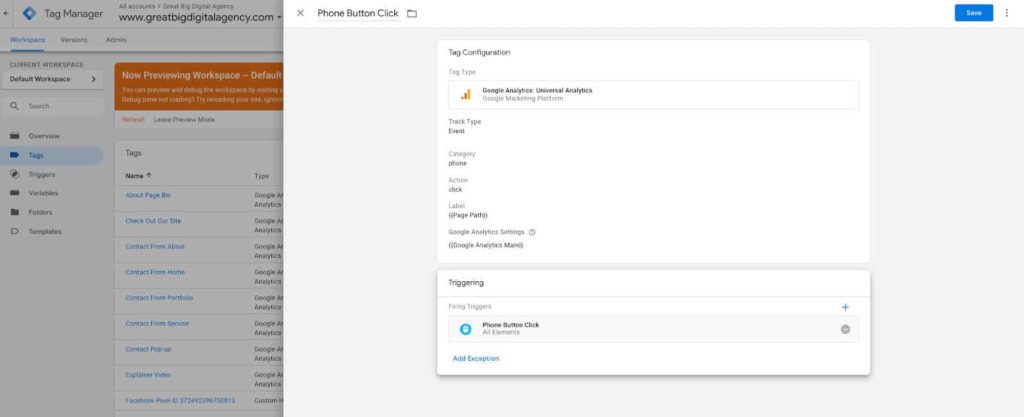
Build Your Google Analytics Tag
Once you have your trigger defined, navigate to Tags and create a new tag. You want to create a Google Analytics Tag and select Event. Put in whatever you’d like in the Category and Action. In label, I put the {{page path}} as I would like to know on which pages people are clicking my phone button. This is a dynamic variable and the brackets indicate to Google Tag Manager to use whatever is in that variable at the time of the click. (note: since I specified in my trigger that I only wanted this to fire on the contact page, the value in the label would only be /contact/, however, if you leave it open-ended it would be dynamic).
Once you build the tag you’ll want to test if it fires correctly. You’ll want to refresh the preview mode so that it updates with your new changes.
Test your changes in Google Tag Manager Preview Mode
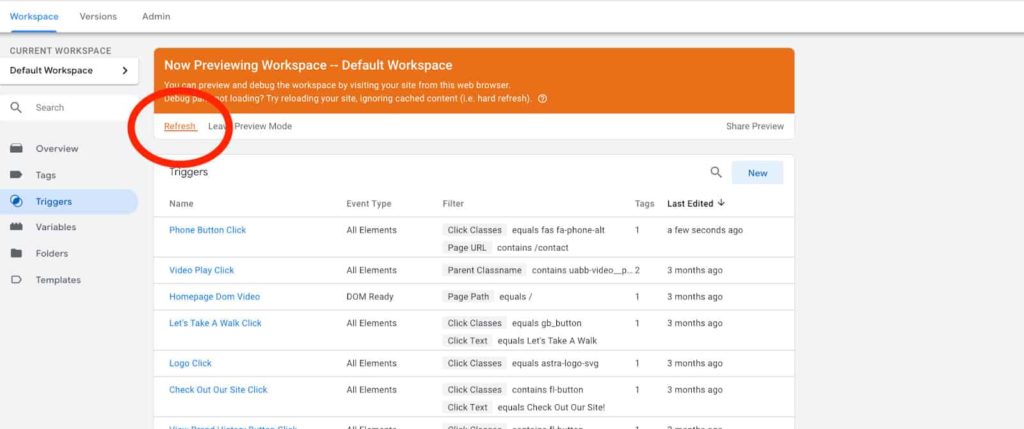
Navigate back to your site and do a hard refresh. Now click the button you want to track again — you should see a tag fire:
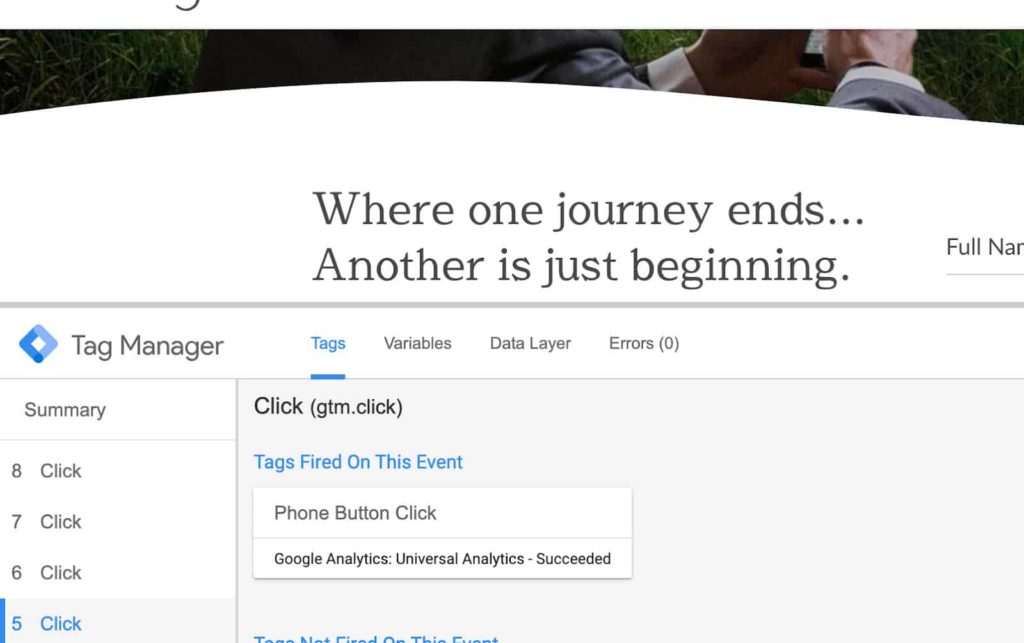
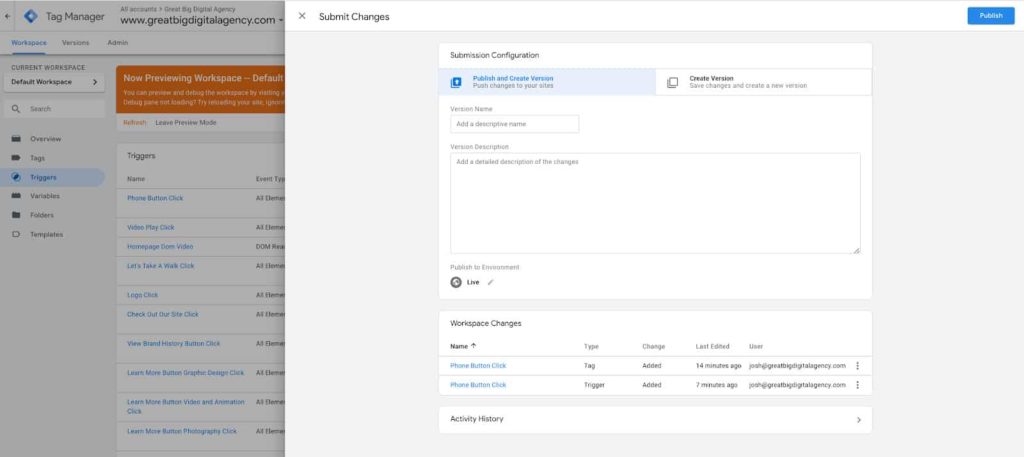
You can also check in your Real-Time reports in Google Analytics underneath events to ensure that the data is being sent to Google Analytics. Great! You’re done in Tag Manager, but before we leave don’t forget to publish your changes live!
Now that you’re completely done with Tag Manager, we just have to define it as a goal.
Build a Goal in Google Analytics
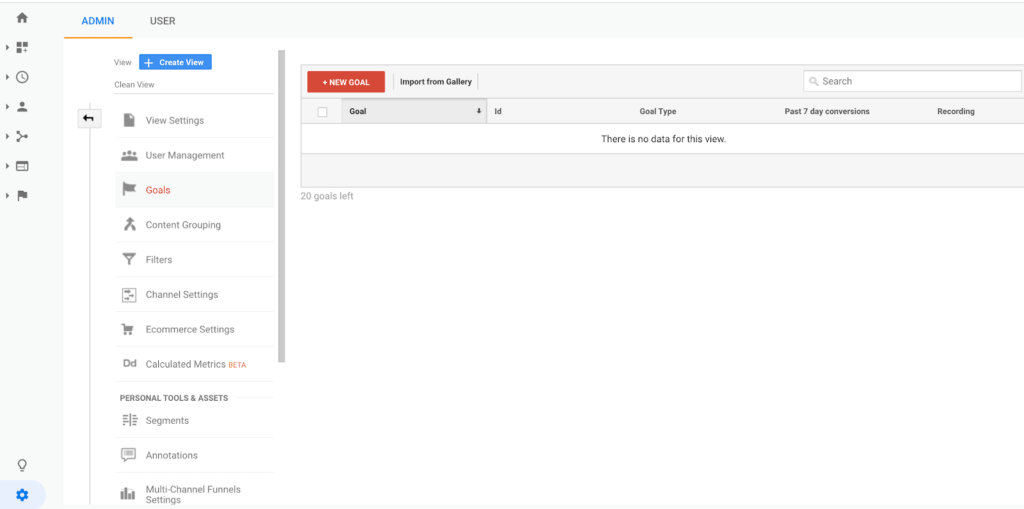
Navigate to Google Analytics in your admin section to find Goals, then create a new Goal.
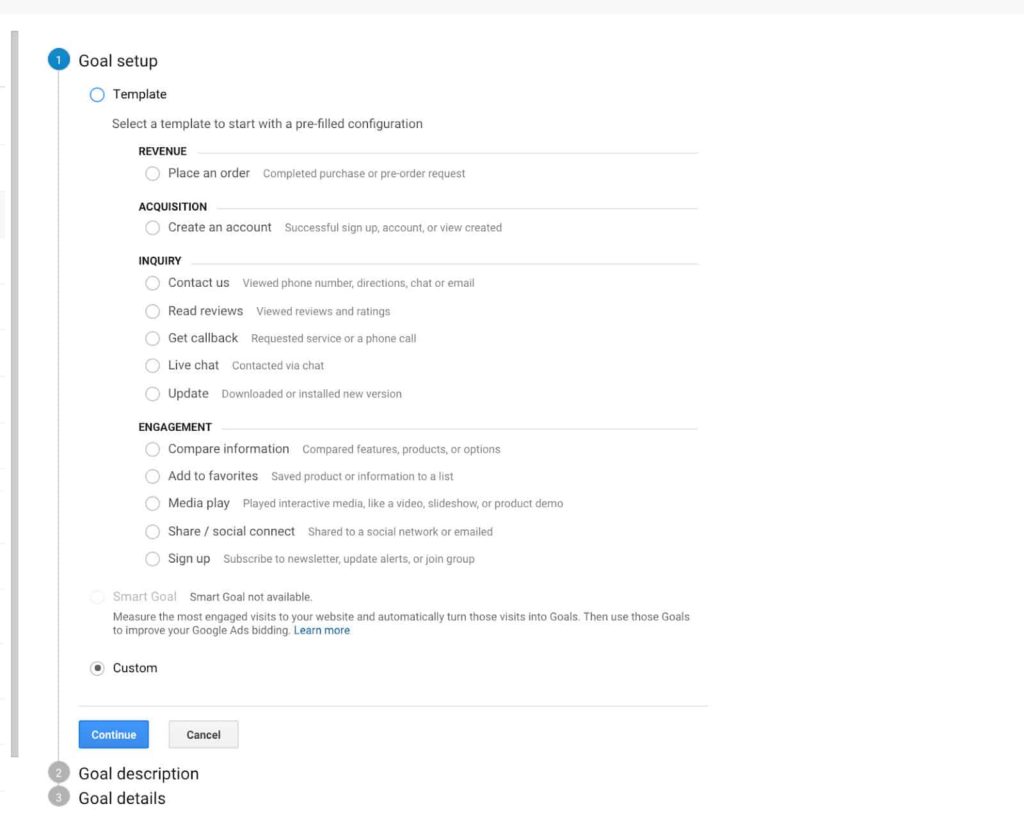
Create a new custom goal.
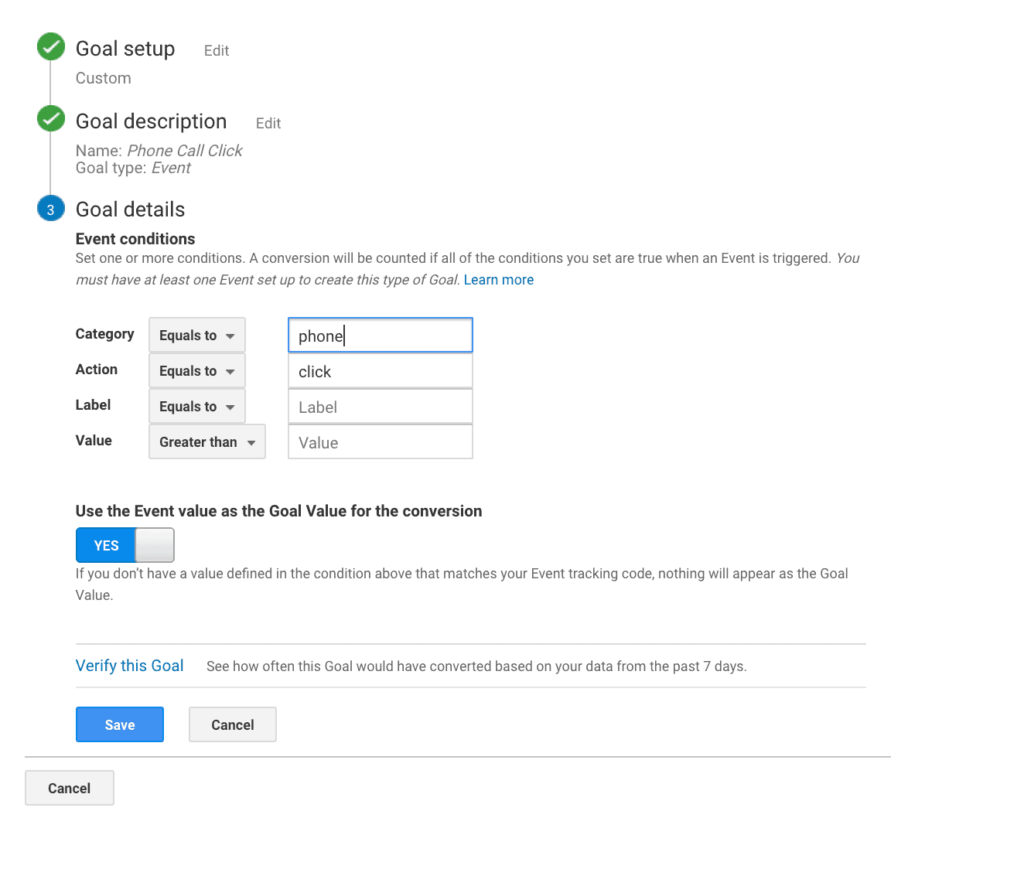
Make sure the new goal criteria matches the static criteria we put in Google Tag Manager.
Any dynamic fields you can leave blank, as Google Analytics will insert anything that Google Tag Manager sends to it. And that’s it! You can bug test by checking out real-time conversions and going through the click motions again. You are now successfully tracking a click goal in Google Analytics with the help of Google Tag Manager.
Have any questions? Leave some comments below!

About Great Big Digital
Achieve your website goals with customized data, intuitive UX, and intentional design.