Layer Masks: Photoshop’s Hidden Gem

What is the difference between a beginner Photoshop user and a super advanced pro? Well, besides years of experience, formal training, and certifications, a nice indicator is that advanced users will be well versed in the utilization of layer masks. Layer masking is undoubtedly one of the most useful techniques in Photoshop for compositing images. Not only does it make any variation of any effect extremely flexible, but it also makes image editing completely non-destructive so you can easily revert back to the way things were before you started.
Don’t Erase! Mask It Away
One of the first tools I figured out was not useful at all is the eraser tool. Not the magic eraser or the background eraser, the simple eraser brush. What this does is permanently delete pixels away from the layer. The operative word in that is “permanent.” That is what is called destructive editing because it does not allow you to go back and make different changes other than the permanent ones you chose to make. So if I’m not using the eraser, how am I getting rid of pixels on my layers in order to reveal certain areas of the layer beneath it? The answer is, of course, using a layer mask. Once you put a layer mask onto a layer, you have complete control of the opacity of every single pixel of its contents. This is done by mapping each pixel on the layer to a grayscale transparency pixel on the mask. White = opaque, Black = invisible, Gray = a transparency between 1 and 100%. When you realize the power of selectively controlling the transparency of your layer, you can accomplish any effect you can imagine!
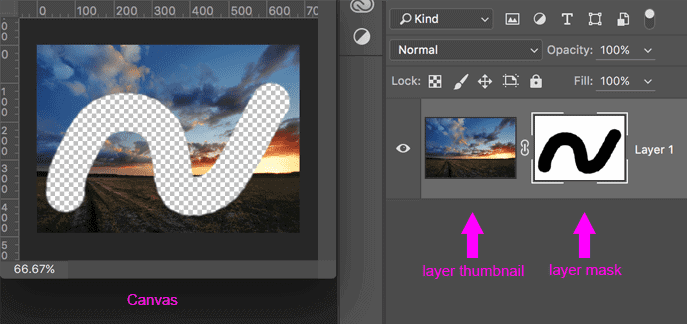
So by the logic of how the layer masks work regarding transparency, using a brush with the black color selected is essentially the same tool as using the eraser. But when you switch the brush color to white, you’ll immediately see how it’s different. Now, with the white brush, you can bring back things that you have “erased” with the black brush. Wow, the eraser tool never did that for me! The best part about a layer mask is that it doesn’t do anything to the layer itself. You are not changing the existing pixels in any way. You are merely hiding and revealing certain parts.
A Better Way of Selecting
How many times have you used the lasso tool to make a complex selection? I’ll bet you held your breath the whole time only to have your hand slip at the last second and your selection was ruined! Then you start over and it’s even worse than the last one. The lasso works well for some things but most of the time does not produce the desired amount of accuracy.
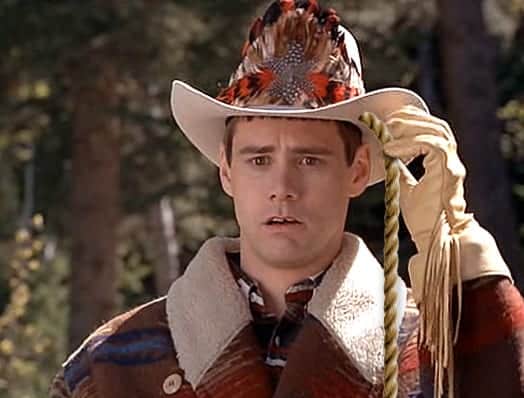
The best practice is to either start with a layer mask, or bring your lasso, marquee, or quick selections inside the layer mask.
Have you ever tried to do the effect where you want a black and white image and then have a few items left in their original color? For example: how would you go about turning this still life into a black and white image with just the apples, rose and flame in full color?
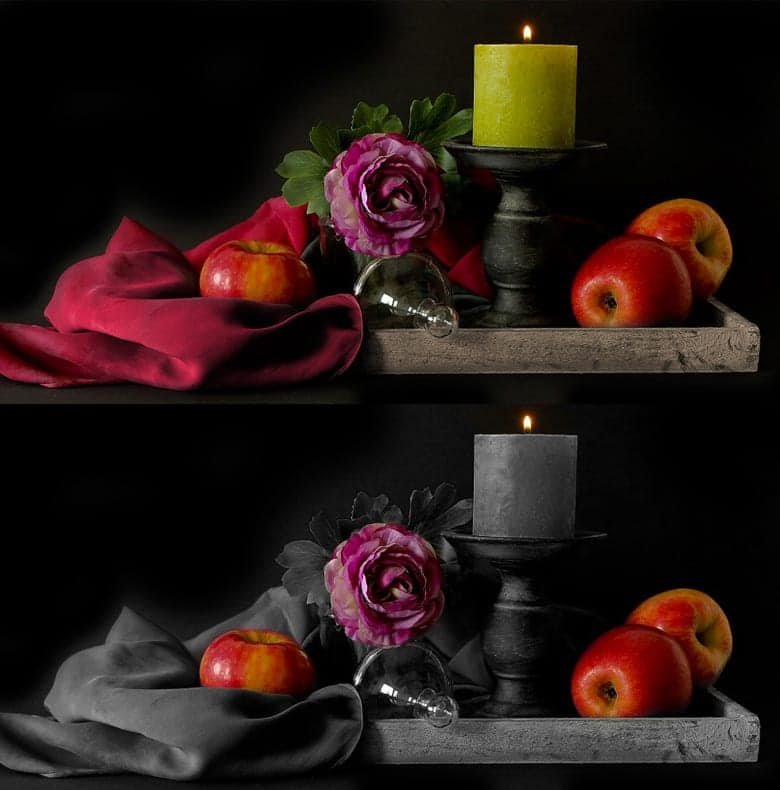
Maybe you would try using the quick selection tool to create a selection and then make new layers from that. Maybe you would use the lasso selection tool. How about using color range to select all the reds? All of these are decent ways of selecting, but my personal favorite method is to do it manually with a brush. This is where you can really combine your digital tech skills with your fine motor skills, and the result is a more realistic composited image. Here is how I accomplished this effect in under 2 minutes:
- Duplicate the layer
- Make the bottom layer black and white
- Give the top layer a negative layer mask (All black: Create by alt+clicking on the create layer mask button)
- Use the white brush to mask IN the color layer
With this method you have complete control of subtracting and deleting from the layer you want to reveal (in this case, the colored layer) by using the brush. When you use the brush, it gives you all sorts of ways to be flexible, exact, or subtle. If you are not used to using the brush, do it now! It is such an amazing way of selecting that you’ll never want to use the lasso tool again. When you use the brush, you can easily change the size, shape, opacity, softness, and flow, giving your selection a much more natural feel. I’m sure you have seen those images that are so obviously “photoshopped” because you can see how sloppily or rigidly they made their selection, and the edges of the layer are distractingly “unreal.”
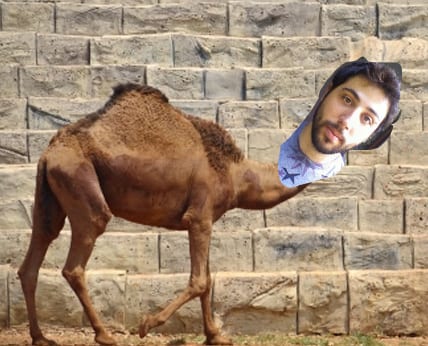
Or maybe they used a selection tool and then increased the feather on the mask to soften the edges but now it just looks like there is a fuzzy object in your image. Using the brush gives you precise control over where your edges are feathered and where there may be a hard edge. Doing your masking details manually with a brush is sometimes the only way to composite an image and have it look realistic.
Making a Different Layer’s Selection into a Layer Mask
Another way using a layer mask is to take a selection from a layer and then use that area as a mask for another layer. For example: I want to take this colorful tree image and then make a very specific darkened mask on top.
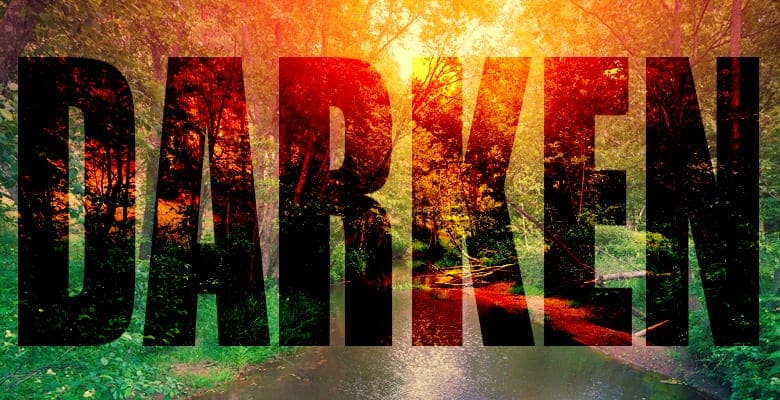
In this case I want to use the text layer as the mask and I don’t want to see the actual text layer.
- Create a text layer and position it over the area of the image you want masked
- Duplicate the background image and change the levels to a high contrast dark image
- Load the text layer as a selection (ctrl/cmd+click on layer thumbnail)
- Click the darkened image layer and add a new layer mask
- Delete (or hide) the text layer
After you create the mask, you can actually move your mask around. To do this without moving the layer itself, you need to break the lock between the layer and the mask. Click the little chain link between the layer thumbnail and the layer mask and now you can move them independently. When you click the layer mask icon and then move the mask around the canvas with the move tool, you will see a cool effect where the letters are moving and the background image is remaining the same.
Create a Custom Vignette
If you are a photographer or edit a lot of photographic images, this technique may be (without hyperbole) the single best thing you have ever learned in your life. There are a few well-known ways to create and edit a simple vignette for your image. One way is to use the camera raw filter, add the vignette effect, and make your adjustments. Another is to create a black circle, invert it, blur the edges, and adjust the opacity. The other is to use Instagram and pretend you did it yourself…Those are all well and good but they only have the effect of imitating a true camera lens vignette and sometimes it can look a little cliché or even fake. Here’s a cool way to do it so that it creates a more vibrant style and can be adjusted to be subtle but still enhance the photo and add more dimension.
- Duplicate your layer
- Set the top layer blending style to multiply
- Add a layer mask to the top layer
- Use a large black brush (with 0% hardness and flow set between 10-20%) to manually paint out the center of the image.
- Adjust overall opacity to create the desired look
- Duplicate that layer as many times as you want to have a more dramatic effect

Doing this as a custom mask will make it not a perfect circle, thus giving it a different look than a lens vignette would have. You can use this effect to draw more attention to the focus of the photo. If the subject is not perfectly center, it makes sense to create your vignette also off-center and in a custom shape that doesn’t leave their face in the dark (which may happen when adding an auto-generated vignette). It also adds more depth when your vignette has been created using the multiply blending mode rather than a flat black layer.
This will add a new level of creativity and professionalism to photos and most of the time people would only be able to tell there is an effect at all if you toggle it on and off. Again the idea is to make things not look “photoshopped” but still add an emotional pop that people can’t even conciously notice.
If you have not explored layer masks in Photoshop, it is definitely time to do that! Even if you don’t want to add artistic effects or do a ton of compositing, layer masks have their place in any type of project workflow. They just make everything easier to edit and give you flexibility to go back and change things without affecting the actual pixels of you layer. They’re also a great way to mask the fact that your image was tampered with and look real and professional.

About Great Big Digital
Achieve your website goals with customized data, intuitive UX, and intentional design.
